Has anyone wondered what goes into the creation of hollow bricks, the strong backbone of modern construction? From raw material selection to the final product, the journey is as complex as it is fascinating.
As an expert in the field of brick manufacturing, I bring years of experience and a deep understanding of the industry’s distinctions.
The process of manufacturing hollow bricks is an art and science, blending traditional methods with modern technology to achieve efficiency and quality.
In this guide, we’ll delve into the 7 critical steps of the hollow brick manufacturing process. Each step is important in the wheel, ensuring the final product meets the high standards of durability and sustainability.
Read on to uncover the secrets of this fascinating process.
Step#1 Raw Material Preparation
In the initial phase of hollow brick manufacturing, raw material preparation is crucial. This step sets the foundation for the quality and consistency of the final product. Here are the key components of this process:
Selection of Materials
As an expert in this field, the journey always begins with selecting the right raw materials. Typically, this includes clay, sand, and water, which are fundamental to brick making. The quality of clay, often determined by its plasticity and purity, is important. For example, a higher sand content might be used to reduce shrinkage during drying and firing.
Proportioning and Mixing
Next, the materials are proportioned to achieve the desired consistency. This involves carefully measuring and blending clay, sand, and water in specific ratios. A homogenous mixture is essential for uniform brick quality. For example, an ideal mix might consist of 50-60% clay and 30-40% sand, with water added to achieve the right moisture level.
Grinding and Screening
The mixed materials are then ground and screened to ensure a uniform particle size, which is critical for the molding process. Grinding breaks down the clay and other components into finer particles, while screening removes any impurities or oversized particles. This step might involve using a roller mill or a hammer mill, with the material often passing through a series of screens to achieve the desired fineness.
| Raw Material |
Description |
| Clay |
Primary raw material for brick production. |
|
Should be well-graded and free of impurities. |
|
Different types of clay can be used, such as fire clay, shale, or kaolin. |
| Sand |
Used as a filler material in brick production. |
|
Should be clean, fine-grained, and free of organic matter. |
| Cement |
Often used in the mixture to improve strength and durability. |
|
Typically Portland cement is used. |
| Water |
Essential for the formation of the brick mixture (slurry). |
| Fly Ash |
A byproduct from coal combustion in power plants. |
|
Can be used as a supplementary material in the mixture. |
| Lime |
Lime is added to the mixture to stabilize clay and improve workability. |
| Plasticizers |
Chemical additives that enhance the workability of the mixture. |
|
Examples include air-entraining agents or superplasticizers. |
| Color Pigments |
Optional, for creating colored bricks. |
| Plastic Sheets |
Used for molding the brick shape, such as polypropylene sheets. |
| Curing Agents |
Chemicals used for curing the bricks and enhancing their strength. |
| Mold Release Agents |
Applied to the mold surfaces to prevent sticking. |
| Reinforcement Mesh |
Used in some cases to enhance the structural integrity of the bricks. |
| Molding Machines |
Equipment for shaping the bricks, such as hydraulic press machines. |
| Drying Chambers |
Facilities for drying the freshly molded bricks. |
| Kiln or Oven |
Used for firing or baking the bricks to achieve the desired hardness and durability. |
Step#2 Molding Process
Transitioning from raw material preparation, the next crucial step in hollow brick manufacturing is the molding process. This is where the prepared mixture begins to take the shape of a brick. Let’s break down this phase:
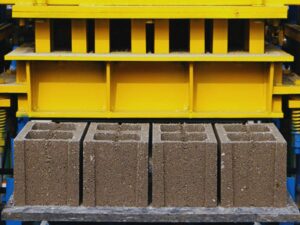
- Feeding the Mixture into Molds: The process begins by feeding the homogenous clay mixture into molds. This can be done manually for smaller-scale operations or mechanically in larger production facilities. Take note that the molds determine the size and shape of the bricks.
- Excess Removal and Surface Smoothing: Once the mixture is in the molds, any excess material is removed to level the surface. This is crucial for ensuring that each brick has uniform dimensions and a smooth surface. Tools like wires or straight edges are often used for trimming off the excess clay neatly.
- Hydraulic Pressing: The final step involves using a hydraulic press, which compacts the clay mixture within the molds. Tabrick’s hydraulic pressing system enhances the efficiency and quality of this process, ensuring each brick is uniformly compacted and has the requisite structural integrity.
Step#3 Drying Stage
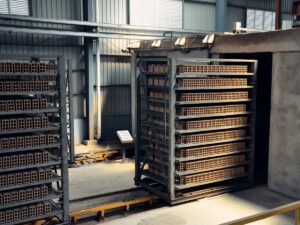
After the molding process, hollow bricks progress to the drying stage. Here, moisture is carefully reduced to prepare the bricks for the subsequent firing process. Here are the essential steps in the drying stage:
- Initial Air Drying: As per Hoentzsch, after the bricks have been shaped, they are dried in batches in the chamber dryer of the brickyard. The initial moisture content is usually 21 – 23 %, sometimes up to 32 % residual moisture. It is usually done at around 100°C, and a residual moisture of up to 1 % is achieved.
- Controlled Drying Chambers: Bricks are transferred to controlled drying chambers. In these environments, temperature and humidity are meticulously regulated to ensure uniform and gradual drying. For instance, a chamber might be maintained at a constant temperature of 50-70°C to steadily draw out moisture.
- Monitor Moisture Levels: Precise monitoring, often using moisture sensors, ensures bricks don’t dry too quickly, which could lead to structural weaknesses. The goal is to reduce the moisture content to an optimal level without compromising the brick’s integrity.
- Gradual Cooling: Once the desired moisture level is achieved, it’s important to allow the bricks to cool gradually to room temperature. This step helps in preventing thermal shock during the firing process and ensures that the bricks are uniformly prepared for the high temperatures they will encounter in the kiln.
Step#4 Firing the Bricks
Following the drying stage, the bricks are ready for firing. Firing transforms the dried bricks into a strong, permanent structure through high-temperature treatment. Let’s discover the key steps in this process:
Loading Bricks into the Kiln
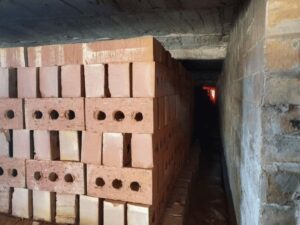
The firing process begins by loading the dried bricks into a kiln. The arrangement of bricks inside the kiln is crucial for ensuring even heat distribution. Bricks are typically stacked with sufficient space between them to allow for proper airflow and uniform temperature exposure.
Ramp Up the Temperature Gradually
Once the bricks are in the kiln, the temperature is gradually increased. This controlled ramp-up is essential to avoid thermal shock, which can lead to cracks or warping. The temperature is typically raised to between 900°C and 1200°C, depending on the clay type and desired brick properties. Advance technologies can assist in monitoring and controlling this temperature rise, ensuring a consistent firing process.
Maintain and Cool Down
After reaching the peak temperature, it’s maintained for a specific duration to ensure the bricks are properly fired. This ‘soaking’ period can vary but is crucial for the development of the brick’s final strength and color. Following this, the kiln is slowly cooled down, a process that can take several hours to a couple of days.
Step#5 Cooling and Curing
After the intensity of the firing process, the bricks enter the cooling and curing stage. This phase stabilizes the bricks, ensuring they are ready for real-world applications. Let’s see how this process unfolds:
- Natural Cooling in the Kiln: Initially, bricks are left to cool naturally inside the kiln. This slow and controlled cooling process prevents thermal shock, which could cause cracks. In my experience, the patience exercised during this phase pays off in the form of structurally sound bricks.
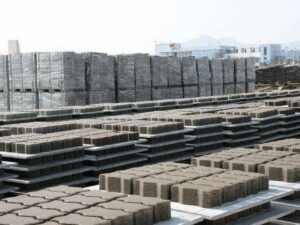
- Transfer to a Curing Area: Once the bricks reach near-ambient temperature, they are carefully transferred to a curing area. This is where they undergo further stabilization. The bricks are often stacked in a way that allows air to circulate freely around them, facilitating the curing process.
- Readiness Test: This involves testing the bricks to ensure they have fully cooled and cured. The bricks are checked for any residual heat or moisture. This is when you can truly appreciate the transformation from clay to durable construction material.
Step#6 Quality Control and Testing
After the cooling and curing process, the bricks undergo quality control and testing. This stage is crucial to ensure that each brick meets industry standards. Here’s a breakdown of this essential phase:
Start with Visual Inspection
The first step in quality control is a thorough visual inspection of the bricks. This involves checking for uniformity in size, shape, and color. Any bricks with visible defects, such as cracks, chips, or irregular shapes, are immediately set aside. This step ensures that only the best-quality bricks make it to the next stages of testing.
Dimensional Accuracy Check
The bricks are then measured for dimensional accuracy. It’s imperative that each brick adheres to the specified dimensions for consistent building quality. In my experience, even minor deviations can lead to significant issues in construction, so precision here is key. This often involves using calipers or other measuring tools to ensure each brick conforms to the predetermined size specifications.
Strength and Durability Tests
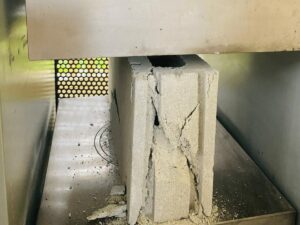
This step involves testing the bricks for their strength and durability. Standard tests include compressive strength testing, where bricks are subjected to pressure until they crack or break. This gives a clear indication of how much weight and stress the bricks can withstand. Tabrick’s hollow brick machine produces bricks that pass strength and durability tests.
Absorption Rate Testing
It’s fascinating to see how different compositions of clay can affect a brick’s density. The water absorption test involves measuring how much water the brick can absorb, which is crucial for understanding its suitability for different climates and construction purposes. Bricks that absorb too much moisture can be prone to frost damage, while those that absorb too little may not bond well with mortar.
Step#7 Storage and Distribution
Once the bricks have passed quality control and testing, they move to the final phase of the manufacturing process. This stage is critical for ensuring that the bricks are delivered in perfect condition. Here are the essential aspects of this process:
- Proper Storage: The first step is storing the bricks in a way that preserves their quality. This involves stacking them in clean, dry areas, away from direct exposure to elements such as rain or extreme temperatures. The way bricks are stacked also plays a role in preventing damage and ensuring easy access for distribution.
- Efficient Inventory Management: Maintaining an efficient inventory system is crucial for timely distribution. In my experience, a well-organized inventory not only streamlines the distribution process but also helps in tracking and fulfilling orders accurately. This approach ensures that all components, including hollow block machines, are accounted for and readily available when needed.
- Safe and Timely Transportation: The last step is the transportation of bricks to their final destination. This involves careful loading, securing, and transporting the bricks to ensure they reach their destination without damage. The choice of transportation, whether by truck, rail, or other means, depends on the distance, volume, and specific requirements of delivery.
Dive Deeper Into Our Resources
Looking for more diverse product options? Browse through our handpicked selections:
Still haven’t found what you’re looking for? Don’t hesitate to contact us. We’re available around the clock to assist you.
Conclusion
In summarizing these steps, we’ve journeyed through the careful and fascinating process of hollow brick manufacturing. This guide shows the complexity and precision required at each stage, ensuring the production of high-quality, durable bricks.
For those seeking to optimize their brick manufacturing process, consider partnering with Tabrick for enhanced efficiency and quality control. For further inquiries, feel free to contact us.


